


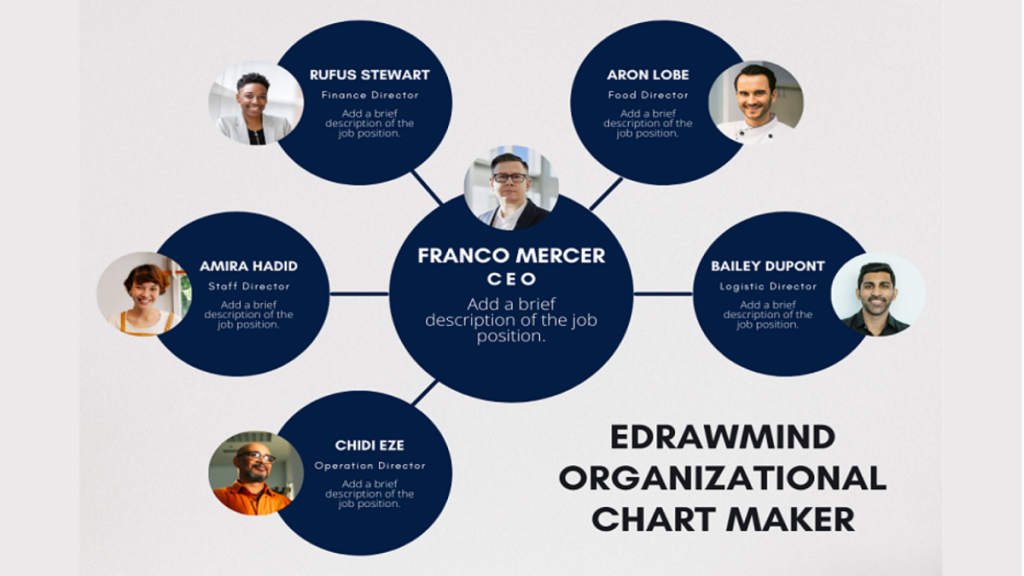
An organizational chart is a diagram that visually represents how an organization works in real-time. Also known as Organograms, these charts show you the employees working in a company and their relationship with each other. A basic org chart has shapes and elbow lines to represent job titles and reporting structure.
Drawing these charts can be a real challenge. And One thing is for sure; it is never practical to draw them by hand. This is why you should turn to diagram software assistance. But the question is, which software is good for newbies?
EdrawMind is a great place to start your journey of org charts. It has a wide variety of editable templates, customizable themes, and an intuitive UI. So, you can make fully-fledged org charts in a short time with minimal effort. Here is a complete guide on how to create organizational charts in EdrawMind.
Key Elements of the Organizational Chart
Now that you know what an org chart is, the next question is what characteristics of these charts make them best to represent relationships between employees in an organizational setting. Here are some key elements that make a well-organized org chart.
- Line of authority is key to making good org charts. So, it should have a clear reporting/ hierarchical structure between the job titles/ employees. For instance, interns report to trainers, who are then supervised by department heads, and so on.
- Attention-to-Detail is yet another important element when it comes to org charts. Hence, there must be in-detailed employee profiles depicting their roles and responsibilities.
- It should also have a well-defined division of labor within the department to promote communication with external stakeholders, new hires, or team members.
- Moreover, it must have visual clarity of the relationship between the employees (how they are interacting in the office setting) at a higher or lower level of management.
How to Create Organizational Charts in General?
There are a few rules when it comes to creating even basic org charts. A well-put org chart works like a visual aid and communicates with the viewers. Got no clue how to approach these diagrams? Here is a complete guide on how to create organizational charts in general.
Define a Purpose
The first step to creating an org chart is defining its purpose or scope. For this, you will have to consider things like why you are making this chart. Is this a resource chart for the team or external stakeholders? It will help tailor the data and layout according to task requirements.
Prepare the Data
Next, you are supposed to gather the information for the chart. The best way to do so is by consulting the HR department. Ask them for up-to-date employee profiles with their names, titles, and contact information. Do consider that adding their headshot photography is always a plus. Similarly, sort them on the piece of paper in a reporting chronology.
Start Plotting
After this, decide where to build this chart. Making an org chart by hand is not practical at all. So, it is always better to use some sort of tool. Once you are clear about the right tool, start plotting the data in a hierarchical order. Next, double-check all the fields after you have added the information.
Add Details
Finally, your company’s org chart is good to go. And this is time for the finishing touches. Add colors, themes, and shapes to make the chart visually appealing. You can also set the calendar plans on this tool for regular updates. Coordinate with the HR department for this purpose.
How to Create Organizational Charts in EdrawMind?
EdrawMind has a wide variety of org chart templates for you to edit and modify. It is easy and cuts the creation process in half. Here is a step-by-step process on how to create organizational charts in EdrawMind.
Before you start creating an org chart using this tool, set up an account. Register your email and set the password. Once done, log into the account and start.
1. Select the Template
Open the EdrawMind Template Gallery from the main menu and select Org Chart as a diagram type from the filters.

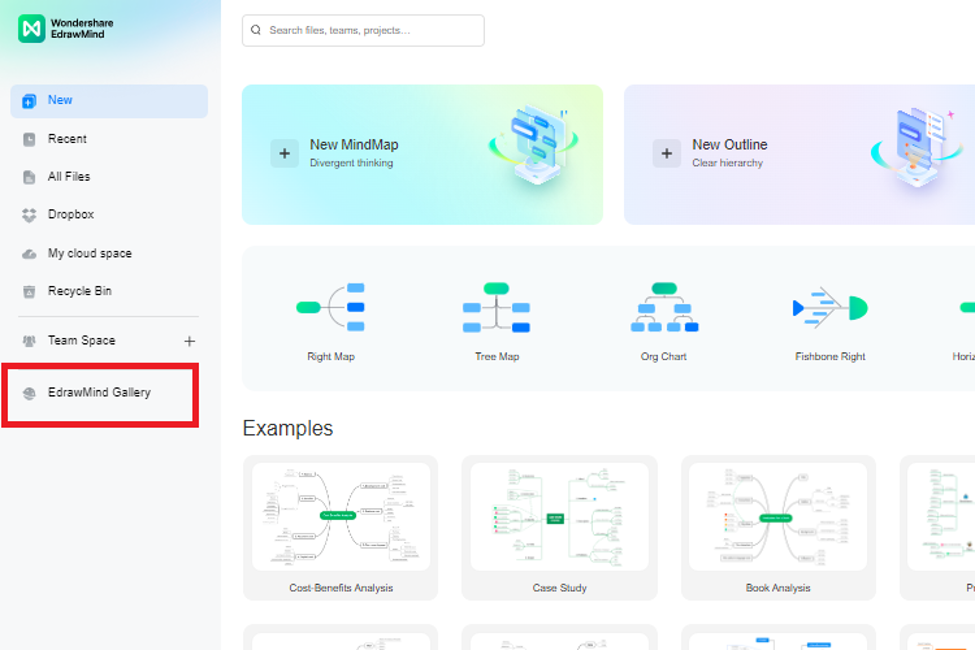
Scroll down and check which template best suits your requirements. Once you are clear, click Duplicate, and the template’s contents will be displayed on the blank canvas.

2. Insert the Information
At this point, you must have all the information about the employees gathered in one place. Enter the employee’s data in the fields. You can always add and remove the fields from the canvas. It is a great idea to add clipart from the right-side customization panel to evoke the viewer’s interest. Double-check all the fields to make sure the hierarchy of the chart is intact.
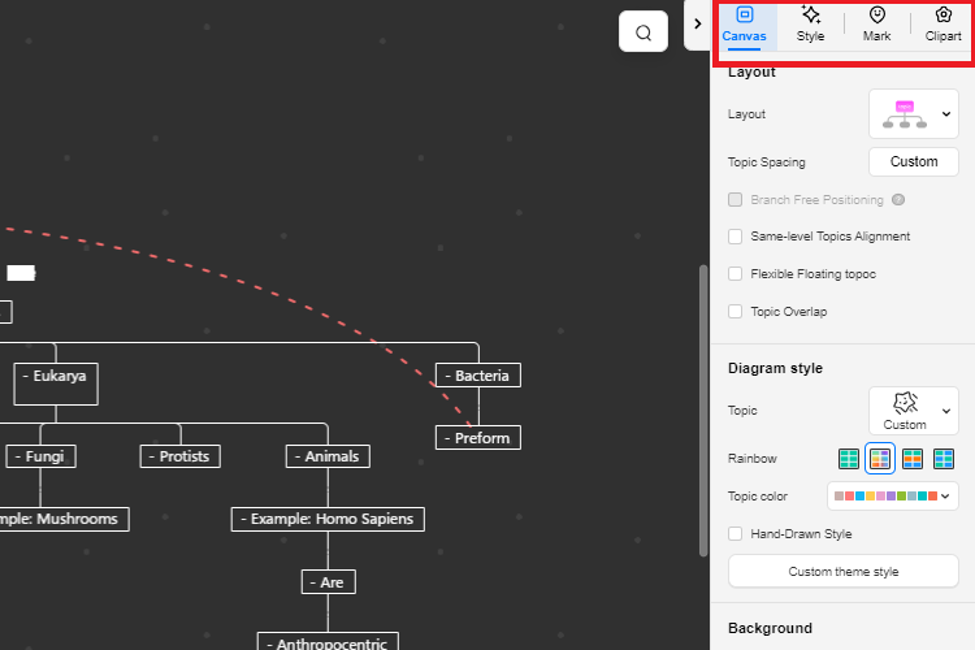
3. Add Colors
The next step is to make it visually appealing. EdrawMind has a number of themes on the right-side editing panel. Use them to change the color scheme of your chart. Or you can always change the font, shape, and color of individual elements from this section. At this point, make sure it is not overcrowded and looks neat. And voila, your org chart is all set.
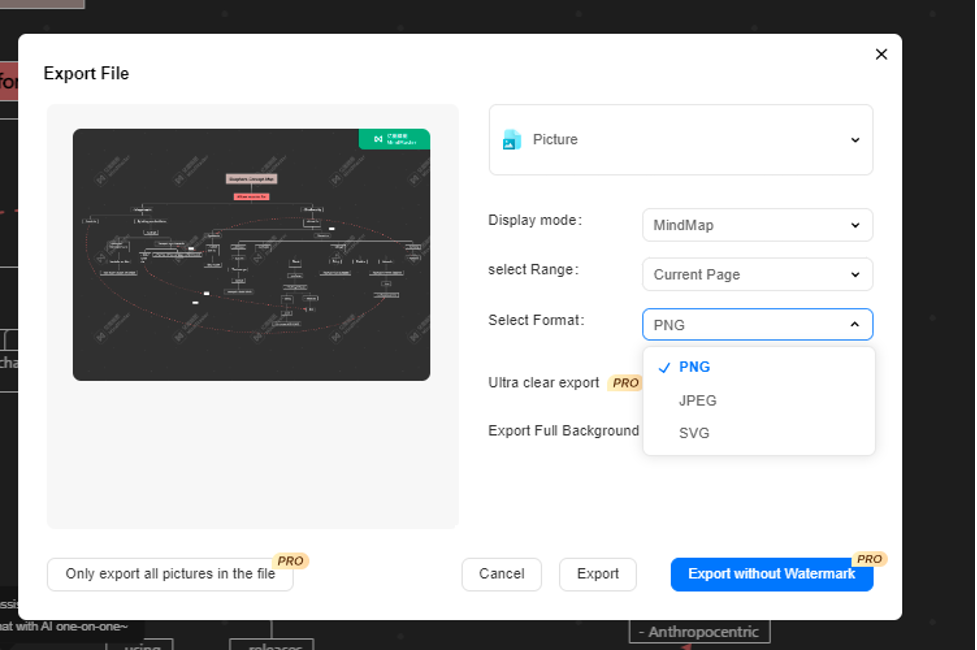
4. Export and Publish the Chart
Download this chart with the Export button at the top-right corner of the editing panel offline. It supports multiple formats for you to download the diagrams. You can also publish this org chart on the Template gallery for other creators to customize.
Conclusion
Making an organizational chart is the first step toward building a well-coordinated and efficient working environment. It helps you organize and manage big companies and start-ups efficiently. However, making one needs practice and software assistance.
Here comes EdrawMind with its effortless UI and a large template gallery, so you can create fully fledged org charts in a matter of minutes. I hope, after reading this guide, it is clear to you how to create organizational charts using this tool. So, if you haven’t already, give this tool a shot, and you will love using it.